Hello!
As I mentioned in the last post, here I'm going to share the pics that I took while I made two parasols. If technically said, I just reinstalled the canopies twice, though, I hope they will help you a bit when you wish to get yourself new parasols.
*As I made a pink version first and decided that I didn't like it, I made another in other fabric that I dyed in two shades of blue. I'm sorry for having too many pictures here, and also for the mixed version of pictures in order to complement my bad explanations. I believe having many pictures is better than relying on imagination, however.
I took the canopy off my old parasol and installed new ones (plural, as I did it twice).
What is most important is that taking notes along with pictures during disassembling to get the idea of the construction order. Constructing a new one is achieved by assembling it in the counter order to disassembling, basically.
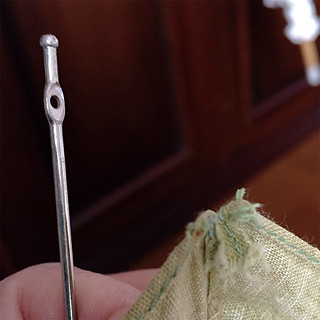
Before dismounting the old canopy
_Take notes about where and how exactly the canopy is sewn on the frame.
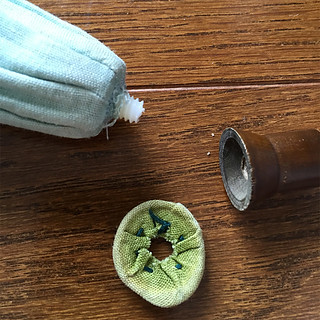
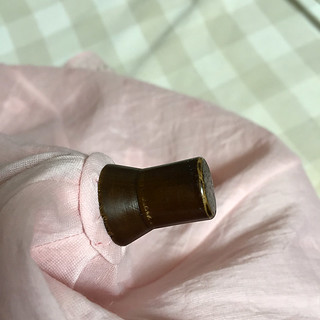
_Check the parasol top whether it is tightened by screw or it is bonded by glue. If it is bonded by glue or if it cannot be disassembled easily, the frame is technically not suitable for refurbishing.
_Disassemble all accessories neatly and keep them for future use, or as a template of new canopy etc.
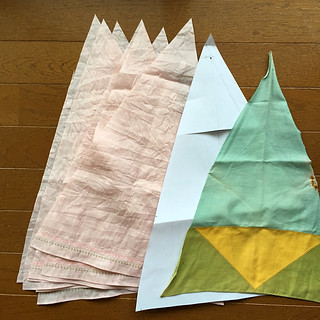
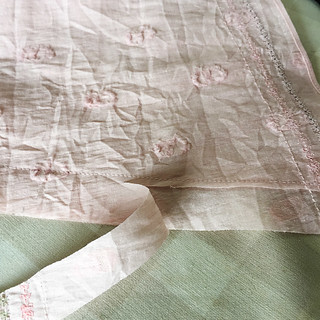
After dismounting the canopy
_Cut out one triangle from old canopy and use it as a pattern after making it flat. Check if the length of side seam of your pattern is shorter but nearly same as the length of the rib. They shouldn't be too different from each other. Said that, it's all dependent on the fabric. Some loosely woven fabrics or others with stretchy fibers may require to be cut much smaller.
_Don't forget adding seam allowances when cutting. I find ~2cm(4/5inch) for side seam allowance is easy to handle in the later steps.
_Other fabric parts have to be examined and recreated if necessary.
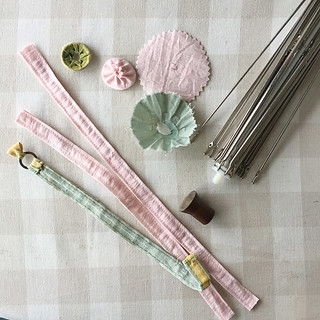
Sewing canopy
(additional note)
_I cut my canopy pieces in cross grain with the purpose for avoiding the whole canopy stretched out horizontally.
_My canopy pieces were cut with 2cm(4/5inch) seam allowance on all side seams. Hem allowance is up to the fabric. My one for pink version was 1cm.
_Hem has to be done before jointing the canopy pieces.
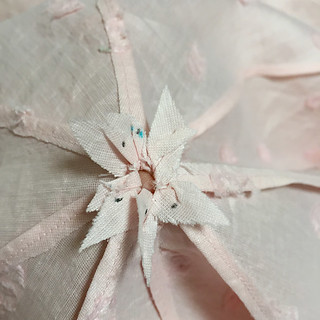
_Firstly make 4 pairs of pieces and sew them as follows.
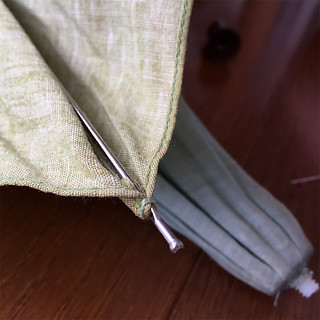
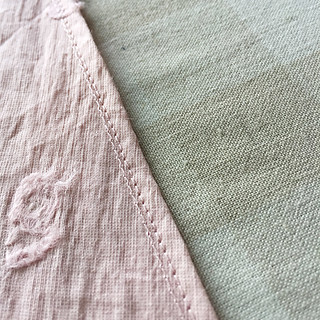
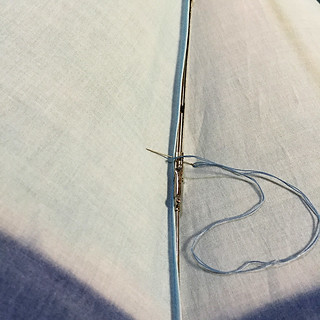
_Sew one of side seams with right sides facing, starting outer end(=edge) and ending inner end, stopping 0.1cm(>1/10inch) before the top of the triangle with secure back stitching.
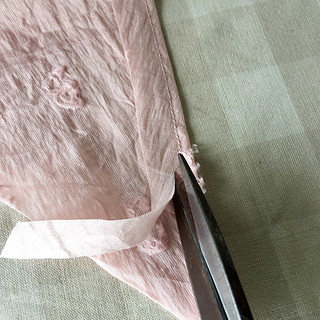
_Trim one of seam allowances leaving 0.4-0.5cm(1/6~1/5inch) to the seam.
_Enwrap the trimmed seam allowance with the untrimmed one, like making a hong kong finish, and sew at a tiny bit outer side of the first stitch to close the trimmed seam allowance.
_Trim the wrapping seam allowance leaving 0.2-0.3cm(1/10inch) on the canopy.
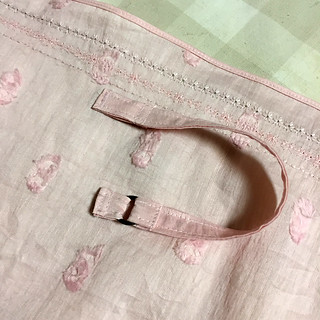
_Sew 2 pairs of jointed pieces likewise, and repeat until all canopy parts are jointed.
_Sew the closure ribbon on the canopy, probably you would like to do it exactly as the old one was attached.
_Turn the flopping top seam allowances inside and press them neatly.
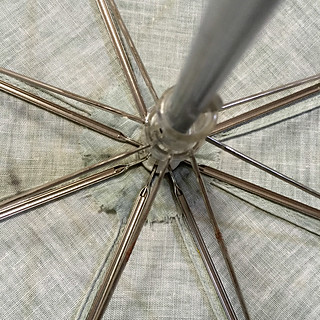
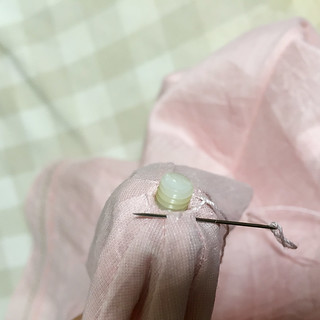
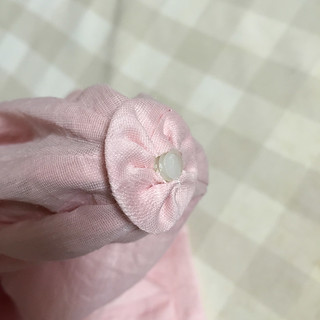
_Place the inner round fabric part on top of the frame.
_Place the canopy on the frame on top of the inner round part, secure it by threading some rounds by hand stitching
_Put the top round fabric part, and put the screw top on top of the parasol.

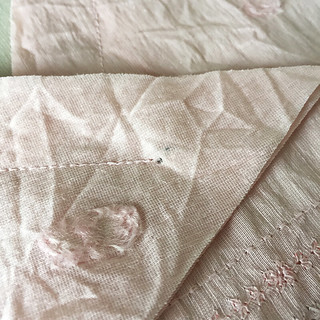
_Attach the canopy to the frame by sewing at all points where the old canopy was attached in the old parasol. Usually it is easier when tips were done first, and then to the ribs.
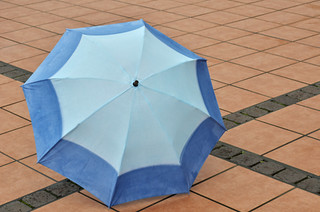 |
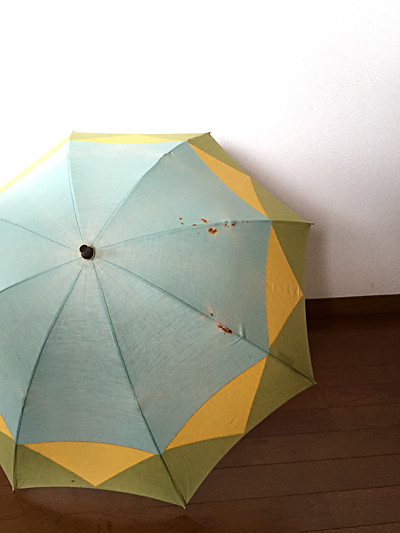
| The colors totally howl "Handmade" and I am kinda proud of it. |
I think experiences tell you everything when thinking of making parasol. After trying one, you will know how easy it is. You will be getting the tricks and tips only after trying some of them by yourself, too. I hope you know what I mean. Good luck!
*Here is a link to the album that contains these pics and also some other ones to complete a set of this topic for those who would like to see them all.
Love,
yoshimi
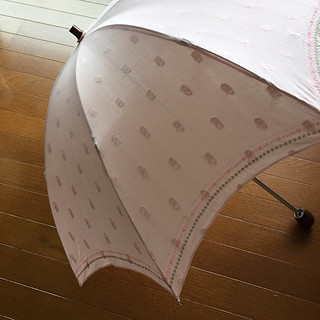 |
| I think this canopy was too tight. |
Do you spray waterproof stuff on fabric to make it rainproof or is this only for sun protection?
ReplyDeleteThis is awesome.
My grandmother used to make dressy parasols for eastern star (fraternal organization). With frou-frous, netting, ruched trim, pinked edges (pinking shears).
ReplyDeleteShe often had a little 'skirt' at the top center. Ruffles around the edge.
Good memories.
Hi kathy! I'm going to use them only for sun protection. I think it is practically possible to make umbrellas with some waterproof fabric, though.
DeleteYour grandmother's parasols sound very special. They must have been used as jewelry!
Thank you so much. After your post I looked up to see how much parasols kits were. Very expensive. So basically if you can unscrew an old umberella/parasol you can recover it.
ReplyDeleteHi Louise, thanks for your comment. Yes, you're right, the kits are rather expensive. I feel they are not much superior than others. I'd reinstall canopies to get new ones in the future too.
DeleteThis is absolutely brilliant! Thank you for a very clear and helpful explanation :)
ReplyDeleteThank you, Carolyn!
DeleteYou are amazing. I am WAY too lazy to ever attempt anything like this!
ReplyDeleteThank you Mariko, and I know! It takes a bit of courage to rip a functioning parasol apart, however, it worth doing, I tell you, Mariko!
DeleteWhat an amazing job.You are wonderfull
ReplyDeleteThank you Sevda! I hope it helps you a bit as an inspiration :)
DeleteWhat a fantastic, inspirational post! All your parasols are so lovely. Thank you for going to the trouble to share your notes and photographs with easy to understand explanations. I would like to try this sometime. :)
ReplyDeleteThank you Lisa! The photos are originally for the records but not for blogging, so I know they're not perfect... but I am glad if they can help you to try your one. Good luck!
DeleteNever would I have thought of making a parasol, but this seems possible, if a bit ambitious for me. I wonder if the top smaller circle would be padded a tiny bit to make it more 3-D? Hmmmmm, now I'm full of sun-shade ideas!
ReplyDeleteThanks as always for the inspiration - I love the shape of the "too tight" one altho I can see the disadvantage of this iteration.
Ceci
Thank you for your lovely comment, Ceci! As for my top smaller circle, it is made of a bias strip of the same fabric. The ends of the strip were sewn to make a circle and then folded in half width. raw edges are gathered to make it flat, leaving a small hole in the center. I hope my writing is understandable!
Delete